Endive is a member of the Chicory family. This family of leafy greens has been prominent on the blog, with Radicchio, Blonde Frisée and Escarole all being featured. Endive can be marketed in two different forms: as a head of leafy greens (similar to escarole and romaine hearts) or as Belgian Endive, which is more of a specialty crop, and is produced by California Endive (as is seen below). The harvesting and packing operation is similar to how endives are grown and sold in Belgium, and they market their product that way.
Table of Contents
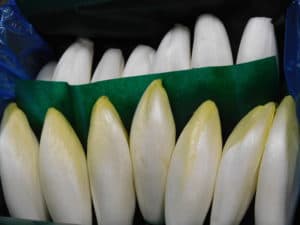
White Endive vs. Red Endive
Growing Conditions
All types of endive grown at this operation are grown under the same growing conditions. Once they arrive at the facility, they are stored in the cooler together and are then grown in dark growing rooms (without light) before being harvested and packed.
Plant Color
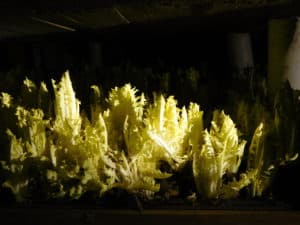
As you can see throughout this post and video, there are two types of endive: red and white varieties. The red and white roots are received separately and are grown in separate growing rooms. Once they start growing, you can very clearly tell the difference. The white endive stays a yellowish-white color while being grown in the dark, while the red endive has red and white leaves. The red endive has a clear resemblance to radicchio (which is also a member of the chicory family).
Plant Flavor
In addition to the difference in appearance, there is also a difference in flavor. The white variety is supposed to be less bitter than the red variety. However, I found the white variety to have a bitter taste and the red variety to taste completely different. The red variety was also fuzzy, similar to the fuzz you find on a peach, whereas the white variety was not.
Plant Production
When comparing the productivity of the red and white varieties, the red varieties only yield approximately 1/3 – 1/4 the amount as the white varieties. This is what happens when the two varieties are grown under the same conditions, so the cost of production is the same, but the white varieties are more profitable for the grower.
Coraline
There is also a third product that is grown under the same growing conditions, called coraline. Coraline is also a member of the Chicory family, and when grown under the dark conditions, it looks very similar to Blonde Frisée, as you can see below.
Growing Chicory Root
Chicory roots are grown and harvested in five month increments. The roots for this operation are grown in three different locations at three different elevations and they are grown so that the harvest dates do not overlap.
The three growing locations are in:
Southern/Central Oregon
Northern California
Central California
The roots take approximately five months to grow and need 220 chill hours in order to be ready for harvest. (This is similar to a fruit tree going dormant in the winter while accumulating chill hours in order to be productive again in the spring.) The goal is to get the strongest roots and they need those chill hours to accomplish this.
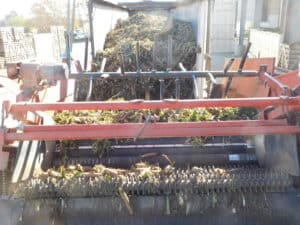
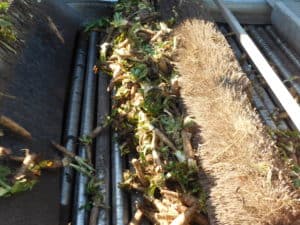
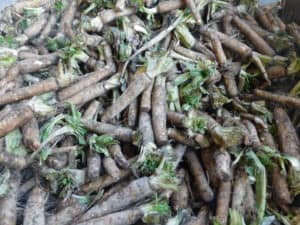
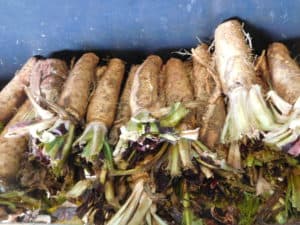
Once the roots are ready for harvest, they are mowed down and harvested using a potato digger that digs out the roots (similar to what you saw with sweet potato harvesting). The end result that gets sent to the facility is a root with mowed tops and trimmed bottoms.
Once the roots arrive at the facility, they are removed from the truck, ran through a conveyor line where any additional soil and field debris is removed and the roots are sorted out by size into different bins. The soil is shaken off during the harvesting process and again upon arrival to the facility and there is no additional soil introduced afterwards during the growing process.
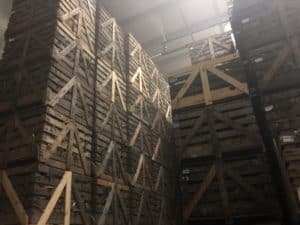
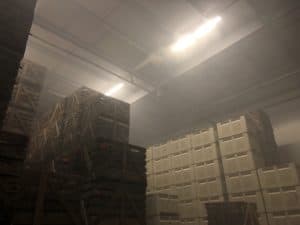
Cold Storage
The bins that have been sorted upon arrival are then transferred into storage rooms that are being held at 28°F. Note that this is below freezing, so the roots are being stored in frozen rooms that allow the roots to stay dormant until the operation is ready to grow the endive from the roots. This allows for the roots to continue the wintering process (if the roots have not yet achieved the 220 chill hours in the field) and also allows for the operation to produce a product 52 weeks out of the year.
Belgian Endive Growing
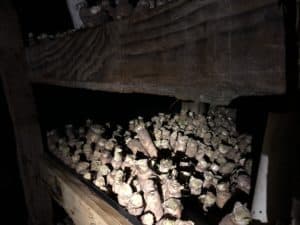
After being in cold storage, once they are ready to start growing, the bins are transferred into the production area, where the roots are packed into growing trays.
Forming Belgian Endive Growing Trays
The growing trays are packed strategically so that there are spacers to allow room for the plants to grow, as well as room for the pipes that transfer the water and nutrient solution to the growing plants (it is a hydroponic setup where no soil is involved).
Belgian Endive Indoor Growing Rooms
The completed growing trays are transferred to dark indoor growing rooms, where there is no light and they are stored at 57°F under high humidity. On average, the growing process in these rooms last about 21 days.
The plants are grown in the dark because when exposed to light, the white plants result in a greener color and a more bitter flavor. As far as the red Belgian endive goes, they remain red whether grown under light or dark conditions. (They also use this growing process with coraline.)
In the pictures below (from left to right), you can see the growth progression from 1 day after planting, 5 days after planting, 17 days after planting (both white and red varieties), and once they are ready to be harvested.
Once the endive is ready to be harvested, they bulge and pop out. At this point, the growing trays are taken to be pre-cooled overnight and are harvested and packed the next day.
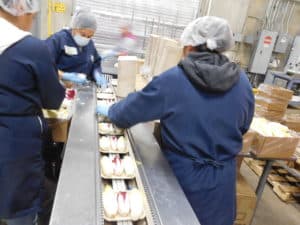
Belgian Endive Harvesting & Packing Process
The endive harvesting and packing process is as follows:
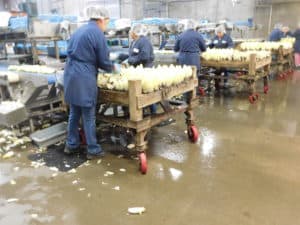
The growing trays are brought out to the packing area and placed onto carts.
A pair of workers harvest the endive from the growing trays and place them onto the packing line.
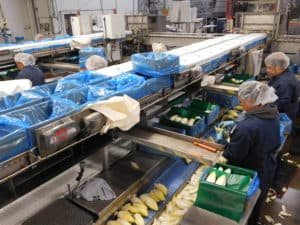
The workers on the packing line clean up the endive by cutting off the bottoms and removing the outer leaves.
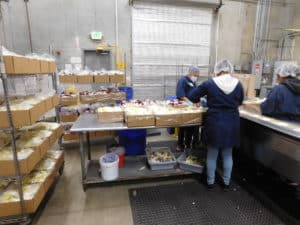
The endive are then packed into boxes. In the bulk boxes, the endive are separated by a wax sheet to prevent any rubbing between the endive. There is also a liner that is placed in the box to help capture any excess moisture.
Another packing method that is used is a retail pack. (This all depends on the customer.) In this case, the packers pack three endive onto trays that get individually wrapped in plastic wrap and boxed up.
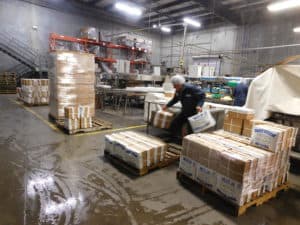
The packed boxes are then palletized and cooled until they are sent out for shipment.
Sanitizing Belgian Endive Growing Trays
After the endive is harvested from the growing trays and placed onto the packing lines, the roots are discarded and sent to cattle fields. This is done because the roots can only produce a primary head once. So, if they tried to use the chicory roots to grow more endive, there would just be off shoots instead of the actual endive plant that they hope to achieve.
Once the roots have been removed from the growing trays, they are individually sanitized using sanitized wash water and a hose. This whole process is achieved prior to the growing trays being used again.
Belgian Endive Growing, Harvesting & Packing Video
Click the video below to see an overview of the Belgian endive growing, harvesting and packing processes.
Featured Grower Information
I would like to thank California Endive for the tour and for allowing the gathered content to be shared. Endive can be used as a substitute to any leafy green dish, as well as paired with common appetizer dishes. Since these endive are smaller than your typical heads of lettuce (think along the lines of the size of romaine hearts vs. heads of romaine), they can easily fit into appetizers as shells or trays. You can see more examples on dish ideas and how to use endive at home at the California Endive website.