
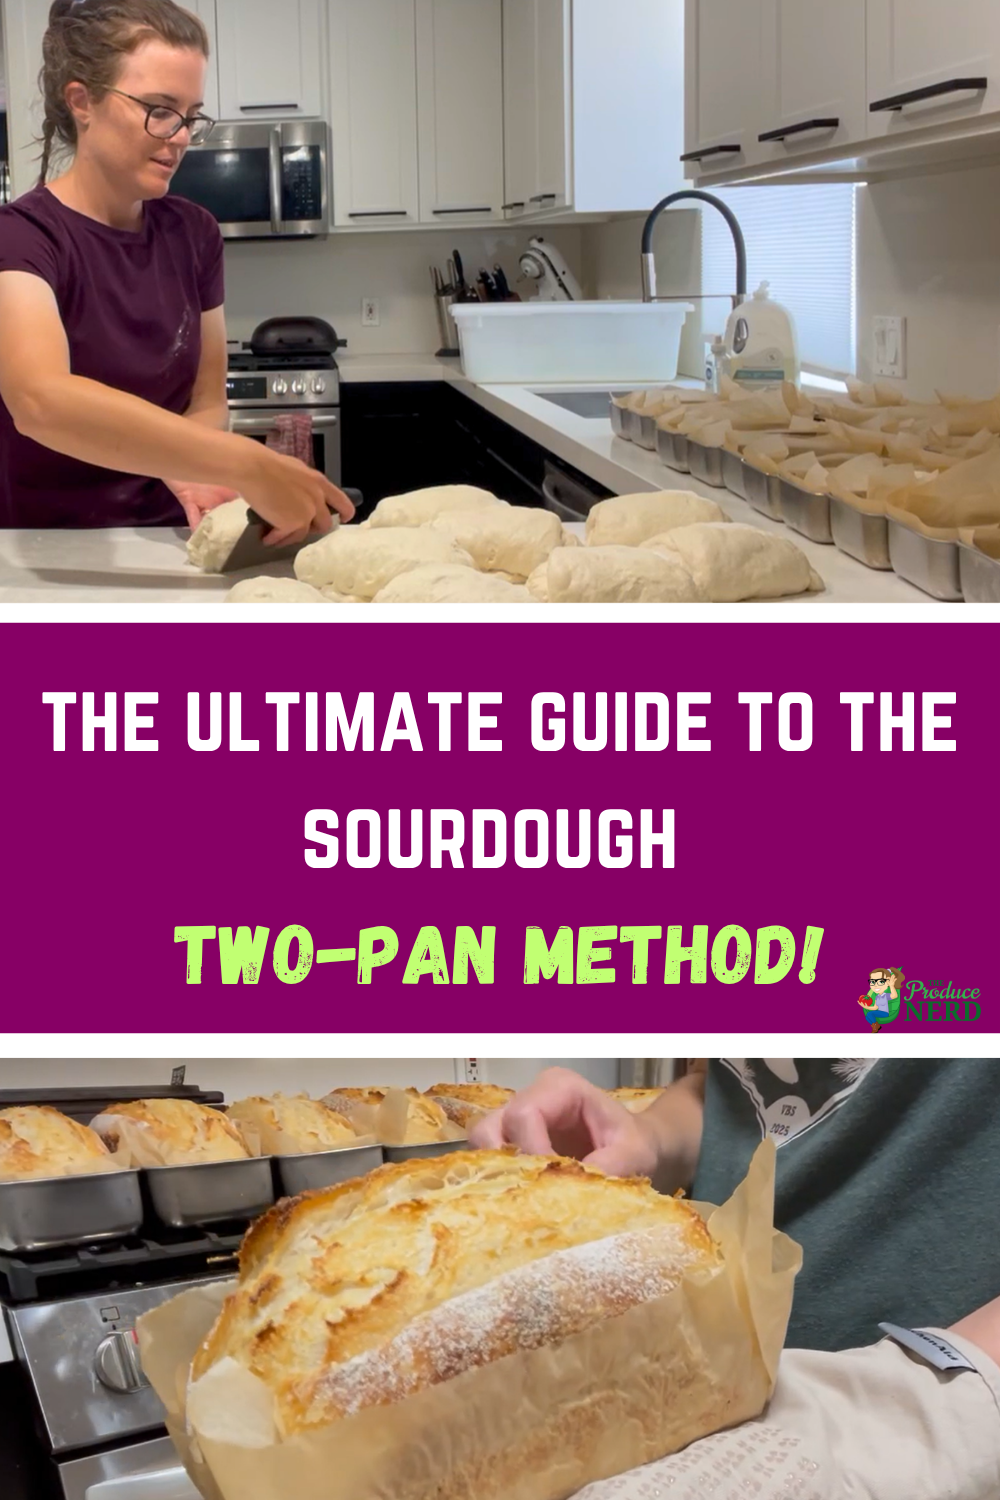
Whether you are a micro-baker looking to bake more loaves at one time, or you just want to learn how to bake sourdough sandwich loaves, or even if you are looking for a method to bake sourdough bread without a Dutch oven, the sourdough two-pan method is for you!
I have tried and tested this method, including with the required equipment, baking times and loaf size, and can confidently recommend my version of this method to you below.
Table of Contents
(Disclaimer: This post contains affiliate links, which means I may earn a small commission if you purchase anything from my links, which will be at no extra cost to you. Thank you for supporting my small business!)
What is the Sourdough Two-Pan Method?
The sourdough two-pan method is where you use two pans to bake a sandwich loaf. Instead of with the traditional artisan (boule) loaves, where you need a Dutch oven of sorts to bake one loaf at a time, you can mimic this heat-trapping process between the two sandwich pans (where one is inverted on top of the other for part of the bake) and bake one or multiple sandwich loaves at one time. By using this method, you will end up with an awesome, colored loaf, with a great crust! The crust will differ from the artisan loaves, where it won’t color up as much, and the crust won’t get as firm, but it will be a little easier to cut through, and honestly, the sandwich loaves are a lot more practical for at-home use with slicing and toasting and making sandwiches, etc.
This method is awesome for micro bakers (home bakers) looking to bake more loaves at one time in a traditional home oven, as well as those who want to make a sandwich loaf instead of an artisan loaf, or someone looking to be creative and bake without a Dutch oven of sorts. (*I keep referring to a Dutch oven, but my pan of sorts for artisan loaves is the Challenger Bread Pan.*)
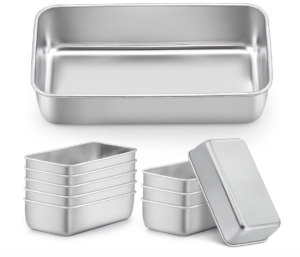
Equipment I Use: My Go-To Sandwich Loaf Pan
To narrow it down for you, I would choose between non-stick and stainless steel pans. For me, I use stainless steel pans because I don’t want any of the toxins from non-stick pans leaching into any of my food that I bake for my family, and therefore, will not use it to bake something for someone else.
These are the pans I use and love! They are so easy to invert (and you don’t need any clips to do so), and you can easily wash them in the dishwasher. (If you are buying these just to bake for yourself at home, I would get the 3 set, but if you are looking to bake in bulk, I would order a few sets of the 10-pack, because remember that 10 pans will yield you 5 covered loaves.)
Since I use stainless steel pans, that means that I need to either use some sort of spray or parchment paper to line the pans. I only use parchment paper, and have never tried adding oil to the pans, because I want to make sure and keep my sourdough recipe to just flour, water and salt and not have to add in any oil that was used. And also, you don’t need the oil. Parchment paper works fantastically.
I use the “If You Care” unbleached parchment paper. I have tried all of the “hacks” where the liners are cut out already, but I have never had success with those. (There is nothing worse than spending all of the time to bake loaves, and then having them come out and be stuck to the pan in the corners!) Therefore, I buy the parchment paper in rolls, rip off rectangular slices and fold them into the pans.
Additional Accessories to Aid in the Two-Pan Method
In addition to the pans and the parchment paper, a few other tools that I always use when making sourdough using the two-pan method are:
- Dusting Wand – I use this to dust flour onto the parchment paper before and after I place the sourdough loaves into the pans. I also use it to dust the countertops with flour before and while working with the dough to form the loaves. It isn’t necessary, but it is easy to use and it makes everything look a little more even.
- Oven Mitts – These are a necessity. I feel like especially with this method, even more so than with the traditional cast iron pan, you need to have good gloves on because once you take the top lid off, the steam comes out and is so hot that if you are only using pot holders or something not as durable, it will be a rude awakening! I have tried oven mitts that have grip on them and those that don’t, and with this method, I prefer to use the non-grippy gloves because they are easier to move the lids and pans around.
- Bench Scraper – I use this quite a bit when baking in bulk, including when measuring out the loaves and weighing them, when lifting the formed loaves off the counter and into the prepared pans, and to scrape off the counter when cleaning afterwards.
- Cooling Racks – You are going to need some sort of cooling racks, whether you are baking in bulk, or are just baking one or two loaves. If not, and you, for example, place the loaves on a plate, whatever part of the loaf is touching the plate will get liquid build up. For the cooling racks, they are all pretty similar, but I prefer the stainless steel ones.
- Important to note: I am not including clips in this list because I don’t use and have no need to use clips to clip the pan and inverted pan together when I place the one pan on top of the other for the first portion of the bake.
You can find my full list of recommended supplies that I use here.
Step-by-Step Two-Pan Forming Guide
- Feed the Starter: I like to feed my starter the night before I plan on mixing my sourdough loaves to have it ready for when I wake up the next morning. Your specific timeframe will depend on your feeding ratio, as well as the environment in which you live (including temperature and humidity), and the season in which you are in (e.g., the time needed for your starter to rise and be ready will be different when it is colder versus hotter). When I am feeding for 1-2 loaves, I use glass dishes that have measurements on the side to show how far the starter has risen. When I am feeding the starter to bake in bulk, I use a large plastic container with measurements on the side.
- Mix the Dough: This will be the same whether you are baking in bulk or just doing one loaf. The only thing that may differ would be the container you use to mix the dough in. (For 1-2 loaves, I prefer to use the 4 quart Pyrex glass bowls that come with a lid. However, when baking in bulk, I use large bulk bins and bulk bin lids (they are unfortunately sold separately).
- Stretch and Folds: I do the stretch and folds every 15-20 minutes until I complete 4 stretch and folds. For small quantities in a bowl, I use the traditional stretch and fold method. For large quantities in bulk, I use the coil folds in the large bulk bins.
- Prepare the Sandwich Pans and Parchment Paper: Before I get started forming loaves, I like to get all of my pans ready to go. I use the parchment paper box to cut the rectangles to use and then form them inside of each loaf pan. I then use my dusting wand to coat the bottom of the parchment paper inside of the pans, and then use it to dust the counter before pouring out the dough that is ready to form.
- Forming Loaves: After waiting for the dough to bulk ferment (again, your timeframe will depend on your environment and how small or large your dough mix is), you will form your loaves. I measure mine out so that all of them weigh approximately 750 grams. (This is very important to note, because this is the loaf size that works best with this method at the time and temperatures that I use.) Up until now, the entire process has been the same as if you were forming an artisan loaf. However, at this step, you will want to form your loaves differently. If you take your dough and stretch it out into a rectangle, you will form the left side in to the middle, then the right side in to the middle (overlapping a bit), and then roll up from the bottom. (Please see my video below for more specific details.)
- Place the Loaves into the Pans: To make this process easier, use your bench scraper to help lift up your loaf from the counter and place into the parchment paper inside of the pans. You will then want to coat the loaves with flour once more.
- Place the Loaves in the Refrigerator: Place the loaves into the refrigerator. I know some people like to cover their loaves with shower caps, but I do not. I only cover mine with a large loose towel that will cover man loaf pans at a time. I find that this provides the perfect texture when it comes to scoring 4-24 hours after placing the loaves into the fridge. If I use a shower cap type of thing, my loaves will be too moist when I take them out to try to score them, and the scoring won’t turn out well.
Step-by-Step Two-Pan Baking Guide
- Heat the Oven: Turn the oven to 450°F. The great thing about baking sandwich loaves using the two-pan method is that you don’t need to wait for the pans to preheat. You just set the oven to 450°F, and once it reaches that temperature, you can place your loaves in the oven to bake.
- Score the Loaves: Since your loaves were already formed and placed into the loaf pans when you put them into the refrigerator, all you really need to do when you take them out of the refrigerator is to score the loaves. I like to score my loaves right down the center. If you find your loaves are still a little “wiggly” or not as easy to score (normally if they have only been in the refrigerator for like 4-8 hours), then I make sure to trace my score one more time or another time in the other direction.
- Put on the Covers: Take the extra loaf pans that you have, invert them and place them directly on top of the bottom pans to create a seal. You will want to make sure that any excess parchment paper is tucked inward, so that nothing is blocking the two pans from coming together.
- The Steam Bake: Bake with the loaves covered for 45 minutes. This step will cause the loaves to rise. I find in my oven that if I am baking in bulk, the limit for my oven is 8 loaves (4 on the top lined up next to each other, and 4 on the bottom the same way). I have seen others say they do 10 at a time per oven, but that is something you will need to test for yourself on your own oven. When doing 10 in mine, the ones I would place in the back would always come out so over-colored that they were unsellable.
- The Color Bake: Remove the top pans (make sure you have oven mitts on while doing this) and bake with the loaves uncovered for an additional 15 minutes, while keeping the oven temperature at 450°F.
- Remove the Loaves from the Oven: Once the baking hour is up, you need to remove the loaf pans from the oven, and then remove the loaves from the pans. To do this, I like to hold the loaf pan in my left hand, and then do a pouring motion into my right hand to get the loaves to fall into my right hand and then I remove the parchment paper from there. Just be careful and make sure that you always have oven mitts on when touching the loaf pans and when touching the freshly baked loaf. Although, you can use your bare hands when removing the parchment paper. Also, make sure you don’t wait on this step, as you want to remove the loaves directly when they are done baking so there is no liquid buildup in the loaves/pans while they are sitting there after baking, which can also lead to the sides caving inward.
Video of How to Make Bulk Sourdough
Troubleshooting Common Issues with the Two-Pan Method: What do I do when...
- My loaf is sticking to the pan: If you encounter this, it will normally be on the sides of the bottom pan, which will indicate that your parchment paper was not big enough to cover the sides of the pan. You have to remember that when you put in your loaf after forming it, that it will rise, so you want the parchment paper to be high enough to prevent the sticking during baking. However, if that happens, all you need to do is get a butter knife and and just very slightly pass it along the edge to break the settled crust from the edge of the pan. As for the top of the pan sticking, I have never had that happen, but I also always do a light coat of flour over the top of the loaf prior to putting it in the refrigerator (after forming it).
- My loaves don’t all come out looking the same: This is normal and will happen if baking multiple loaves in the oven at one time, based on your oven. For example, the ones I bake on the farthest left of my oven always come out a little darker on certain parts than on the right side. If you are just baking for yourself, bake to your preference. But, if you are baking for others, it always seems to work out because there are people who prefer a darker looking crust than others do.
- The pans are slipping: I will reemphasize here that if you are using the pans that I recommend, you do not need to use clips to keep them together! If they are slipping, which they might sometimes when putting them into the oven, just realign them and they will stay on normal while baking. I have also found that when using oven mitts that grip, it is easier for the pans to slip while placing them into the oven, and that is why I prefer the plain oven mitts while baking these loaves.
- My loaf has a gummy texture: Most often, you are cutting into your loaf too quickly after it finishes baking. If you let it cool for an hour, it will still be a bit warm and a bit gummy, so the longer you can wait, the better with that. Although, it always seems like a better idea to cut into it right out of the oven when it’s fresh!
Frequently Asked Questions
Can I cold proof sourdough directly in a loaf pan?
Yes, when using stainless steel pans, like the ones I recommend. You will need to either place them inside of parchment paper or grease the pan prior to placing them into the pans and into the refrigerator. This also works with aluminized steel pans, but does not work if using a cast iron or carbon steel loaf pan.
What do I cover my sourdough sandwich loaf pans with when cold proofing in the refrigerator?
I prefer using loose towels to cover the tops of my loaf pans. With my hydration percentage, I find that by doing this, the loaves still rise, but are still able to be scored when I go to put them in the oven. A lot of people recommend using some form of a shower cap (if so, I recommend these), but I find that with my higher hydration percentage, mixed with the shower caps, the loaves are too ‘jiggly’ and difficult to score by the time I go to score them to put them in the oven.
Please note that I also normally use towel covers with my artisan loaves, but I do not have this same problem when using a dough cover, that is similar to a shower cap.
Do I need to preheat the loaf pans before adding the dough?
No! That is one of the really great things about baking sandwich loaves because it saves time and prep work (even though the baking time is 20 minutes longer, in my case, between baking artisan loaves and sandwich loaves). All you have to do is to prep the loaves into the sandwich pans, and then place them into the refrigerator to cold proof, then turn the oven to 450F when it’s time to bake and once it hits 450F, you take your loaves out of the refrigerator, score them, place the lids on top, and place them directly into the oven. There is no needing to wait for the pan to pre-heat.
Do the two loaf pans have to match completely?
Yes, the pans need to match completely. For the tw0 pan method, you need the top pan inverted directly above the bottom pan, which allows the steam to be trapped, like a cast iron/Dutch oven type of pan for the artisan loaves. If the pan above is not the same dimensions, your crust will not come out right.
I actually tried this once and the crust came out really hard and like it was dried out.
Do I have to score sourdough baked in a loaf pan?
Yes, if you want it to look nice! If you do not score it, it will be just like an unscored artisan loaf, where it will kind of just pop out wherever it decides to pop out.
How do I score a sourdough sandwich loaf, prior to baking?
I prefer to do a line right down the middle, so that when it bakes it will pop up and out. I find that when scoring, I like to score it down the middle and then trace the line once or twice more to make sure it got the whole loaf.
Can baking in a loaf pan save overproofed sourdough?
Not when it comes to cold proofing in the refrigerator. When I have tried to do this, I take it out of the banneton that it was in (destined to be an artisan loaf), reshaped it into a sandwich loaf and place it into the sandwich pans, and the loaf did not turn out like a normal sandwich loaf. It didn’t get a good rise as a sandwich loaf either.
However, I have found that when you leave the dough out for a little too long to bulk ferment, that it doesn’t affect much when you bake it as a sandwich loaf (it just might have some more air pockets).
Can I use my favorite artisan sourdough recipe in a loaf pan?
Yes. I use the same recipe and the same amount of grams for both my plain artisan and sandwich loaves (that only consist of bread flour, water and salt).
How many double-pan loaves can I bake at once in a standard oven?
Using my home oven, I can bake eight loaves at one time: four along the top row, and four along the bottom row. When baking this many at a time, I do not alter the oven temperature at all, I just make sure that the pans are not touching each other.
I know people mention doing more at times, but you really need to test out your oven and see how the loaves bake and color up before you plan on doing this regularly.
Supplies for Packaging the Sourdough Sandwich Loaves
For packaging the sourdough sandwich loaves, you are going to want to use some sort of plastic/see through bag. The cute brown artisan bags don’t work on this size of sandwich loaf! Where I am located, it gets really hot and humid, so these are the bags that I have found to work the best here. They are a bit large but you can tie them up and they are perforated to prevent any condensation in the bags or on the loaves. Below, are some examples of what the bags actually look like with sandwich loaves in them, and on display.
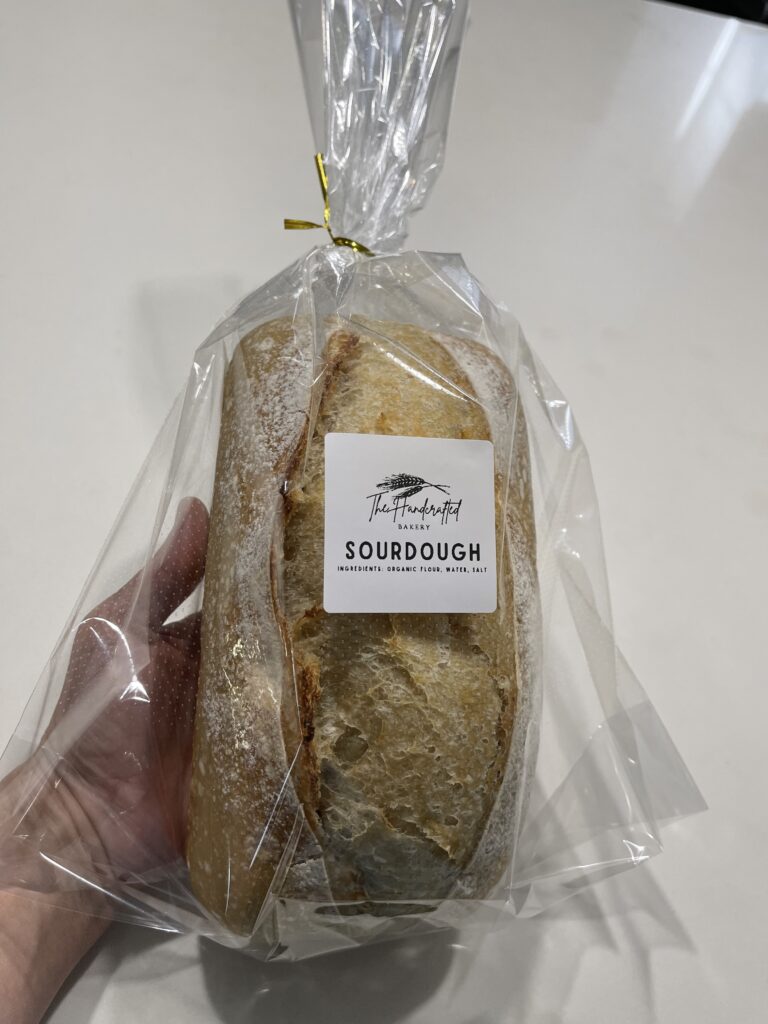
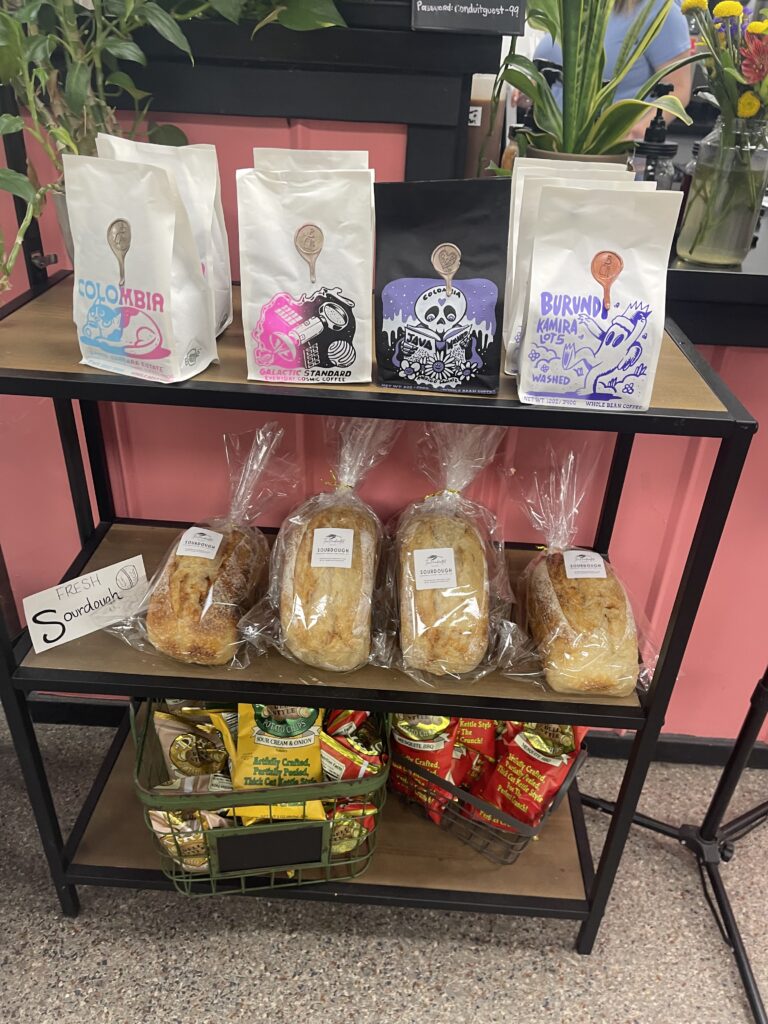
Those bags come with golden-colored twist ties (as you can see in the picture above on the left), and those are fine. However, if you are interested in something different, you can find a lot of other options on Amazon for that. The ones I have ordered separately and prefer are these twist ties.
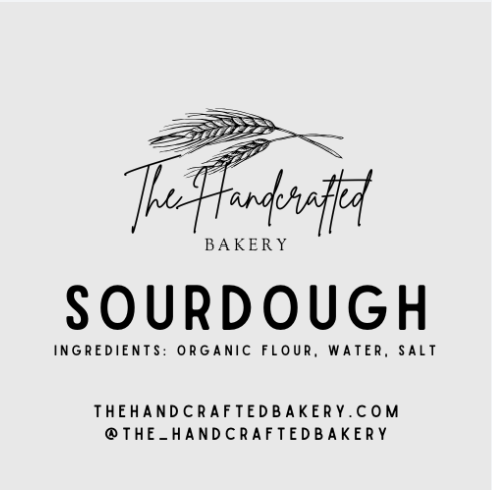
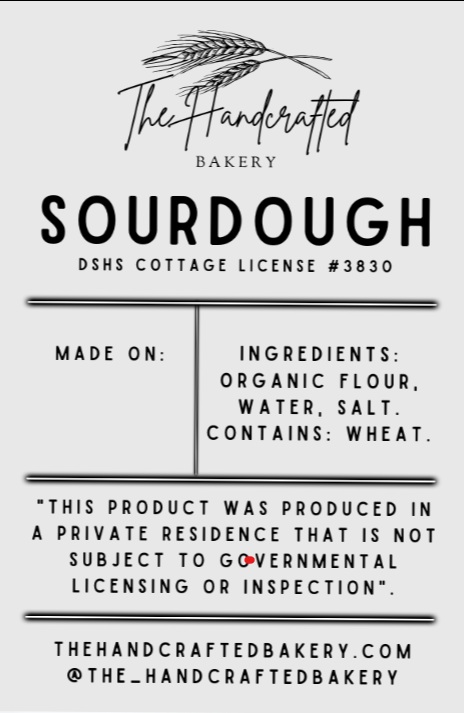
The other important thing to consider if you are making these sandwich loaves and are intending to sell them, you will need proper labeling. For example, if you are a cottage baker, you need to have the proper cottage labeling on each package. What I do for mine, is I do the official cottage bakery labeling on the back of the bag (which you can’t see in either of the pictures above), and then put a nice, brief marketing label on the front of the bags that includes the name of the product, ingredients and some contact information. In order to do this, and really simply at that, I use a thermal printer. Specifically, I use this Mumbyn thermal printer.

For the actual labels that you need to print, I prefer the 2″x2″ labels for the front label, which I refer to as my “marketing label.” And, then I use the 3″x2″ labels for the labels I put on the back of the bags that include all of my cottage bakery information. Here are some examples of the exact labels that I have been using as of late on my sourdough sandwich loaves.
I hope this post was helpful, and will help take you to the next step in your sourdough journey! Really, making all of these loaves at once and then just baking them in a few hours versus 45 minutes per artisan loaf, is such a breeze!
If you enjoyed this post, and are looking to learn more about sourdough and/or cottage bakery, please check out the following posts: